Azure Sentinel – What is it and why should I care?
The cloud offers advanced security
Application and infrastructure security is extremely important to get right. There are many aspects to security, including closing and opening the right data ports and protecting data and accounts. Other aspects of security are probably more difficult to implement and use. These are the detection and handling of security incidents and threats.
Azure Sentinel (opens new window)provides a threat detection and mitigation service that helps you to detect incidents and threats when they happen and helps you to solve them as effectively as possible. In this post, we’ll explore what Azure Sentinel is and how you can use it to protect your organization.
#Prerequisites
If you want to follow along, you’ll need the following:
- An Azure subscription (If you don’t have an Azure subscription, create a free account (opens new window)before you begin)
#What is Azure Sentinel?
Azure Sentinel (opens new window)is a SIEM (security information event management) and SOAR (security orchestration automated response) system in Azure. This means that it can detect security incidents and threats and alert on them. And that you can use it to investigate and mitigate threats. Azure Sentinel can collect data from all sorts of data sources, like the Azure Security Center (opens new window), Azure Active Directory (opens new window), Office 365 (opens new window), Amazon Web Services (opens new window), CyberArk (opens new window)and more. It can detect incidents in the data from those data sources and alert you that something needs your attention. You can get insights into the raw data and potential malicious events and incidents through overviews, dashboards and custom queries. And once an incident occurs, you can choose to have it trigger an Azure Sentinel Playbook (opens new window), which is a Logic App (opens new window), that initiates a process of automatic mitigation.
And maybe the best part of Azure Sentinel is that it is a native part of Azure. This means that it is scalable, always available and that it is secure. Let’s learn more by using Azure Sentinel.
#Getting started with Azure Sentinel
Azure Sentinel is part of your Azure subscription and uses an Azure Log Analytics Workspace (opens new window)for its data. Let’s set it up and see how we can work with it:
- Go to the Azure portal(opens new window)
- In the searchbox in the top, type Sentinel. This will show the result for Azure Sentinel. Click on the result
- You can now add a Log Analytics Workspace to Azure Sentinel. Let’s create a new workspace. Click Add > Create a new workspace a. Fill in a name for the Log Analytics Workspace b. Select an existing Resource group or create a new one c. Select a Location d. Click OK to create the workspace
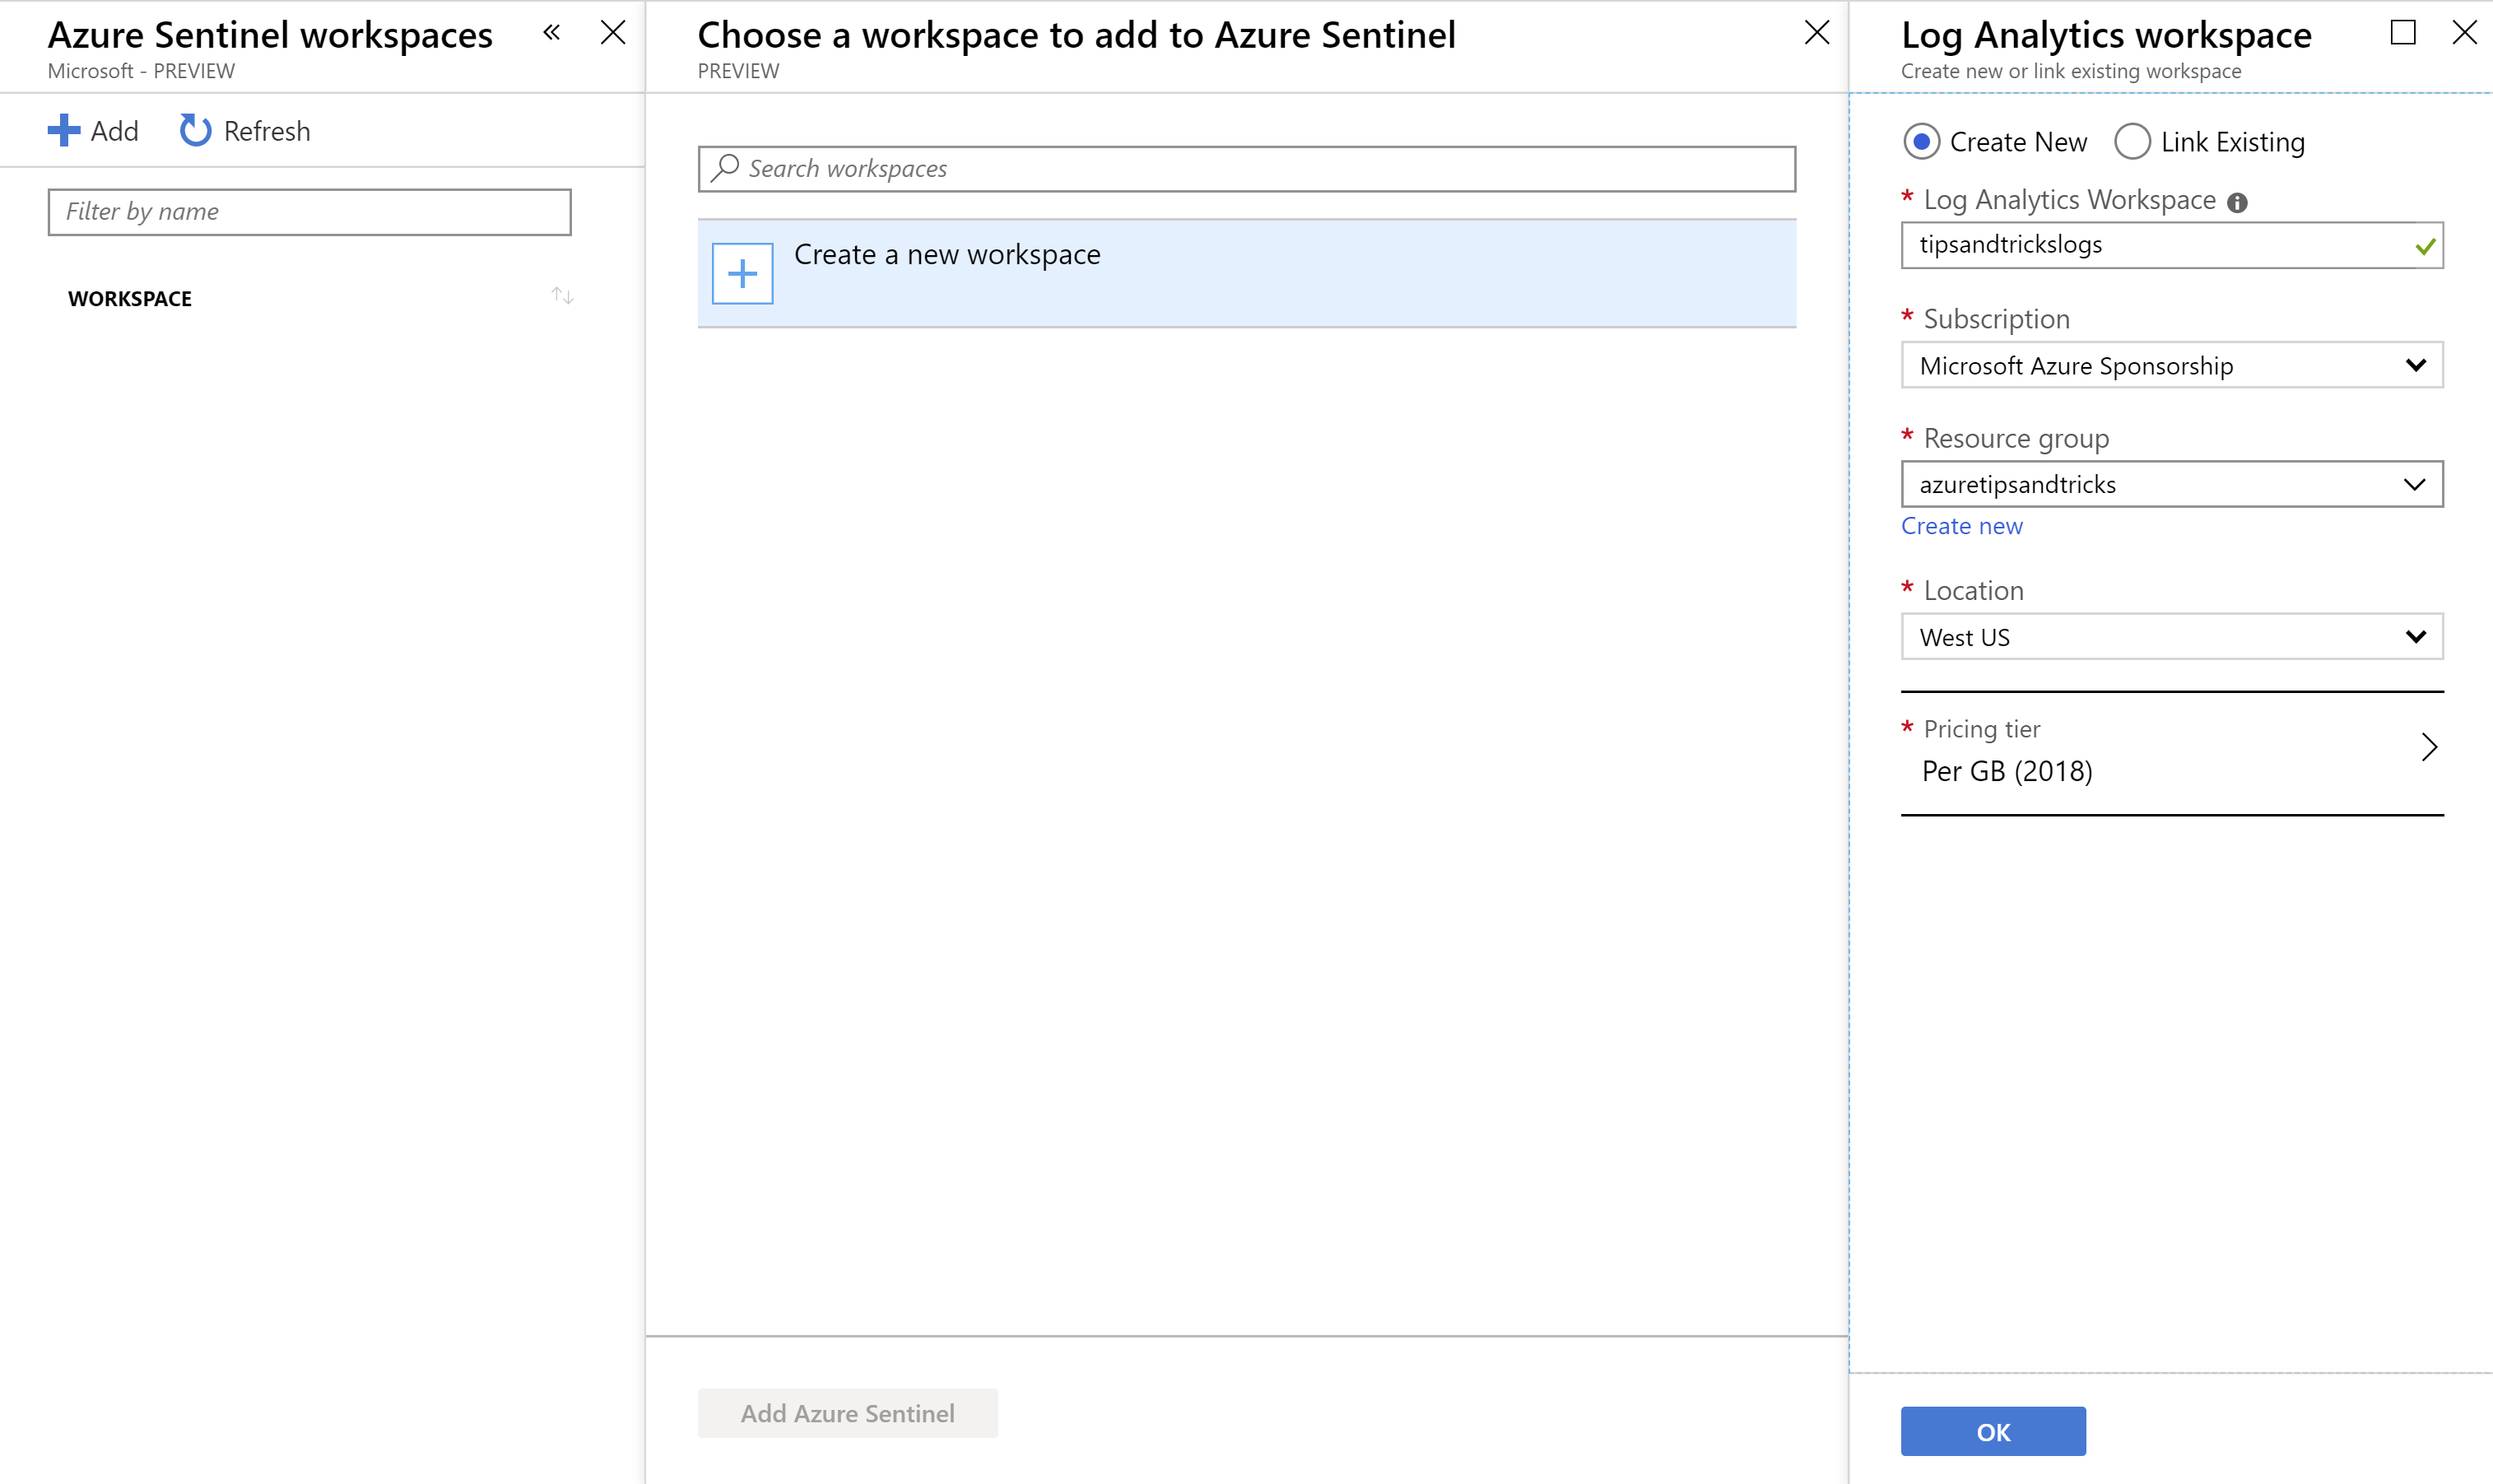
(Create a new Log Analytics Workspace in the Azure portal)
- When the workspace is created, click Add Azure Sentinel to add the workspace to Azure Sentinel. When this is done, you’ll see the Azure Sentinel overview
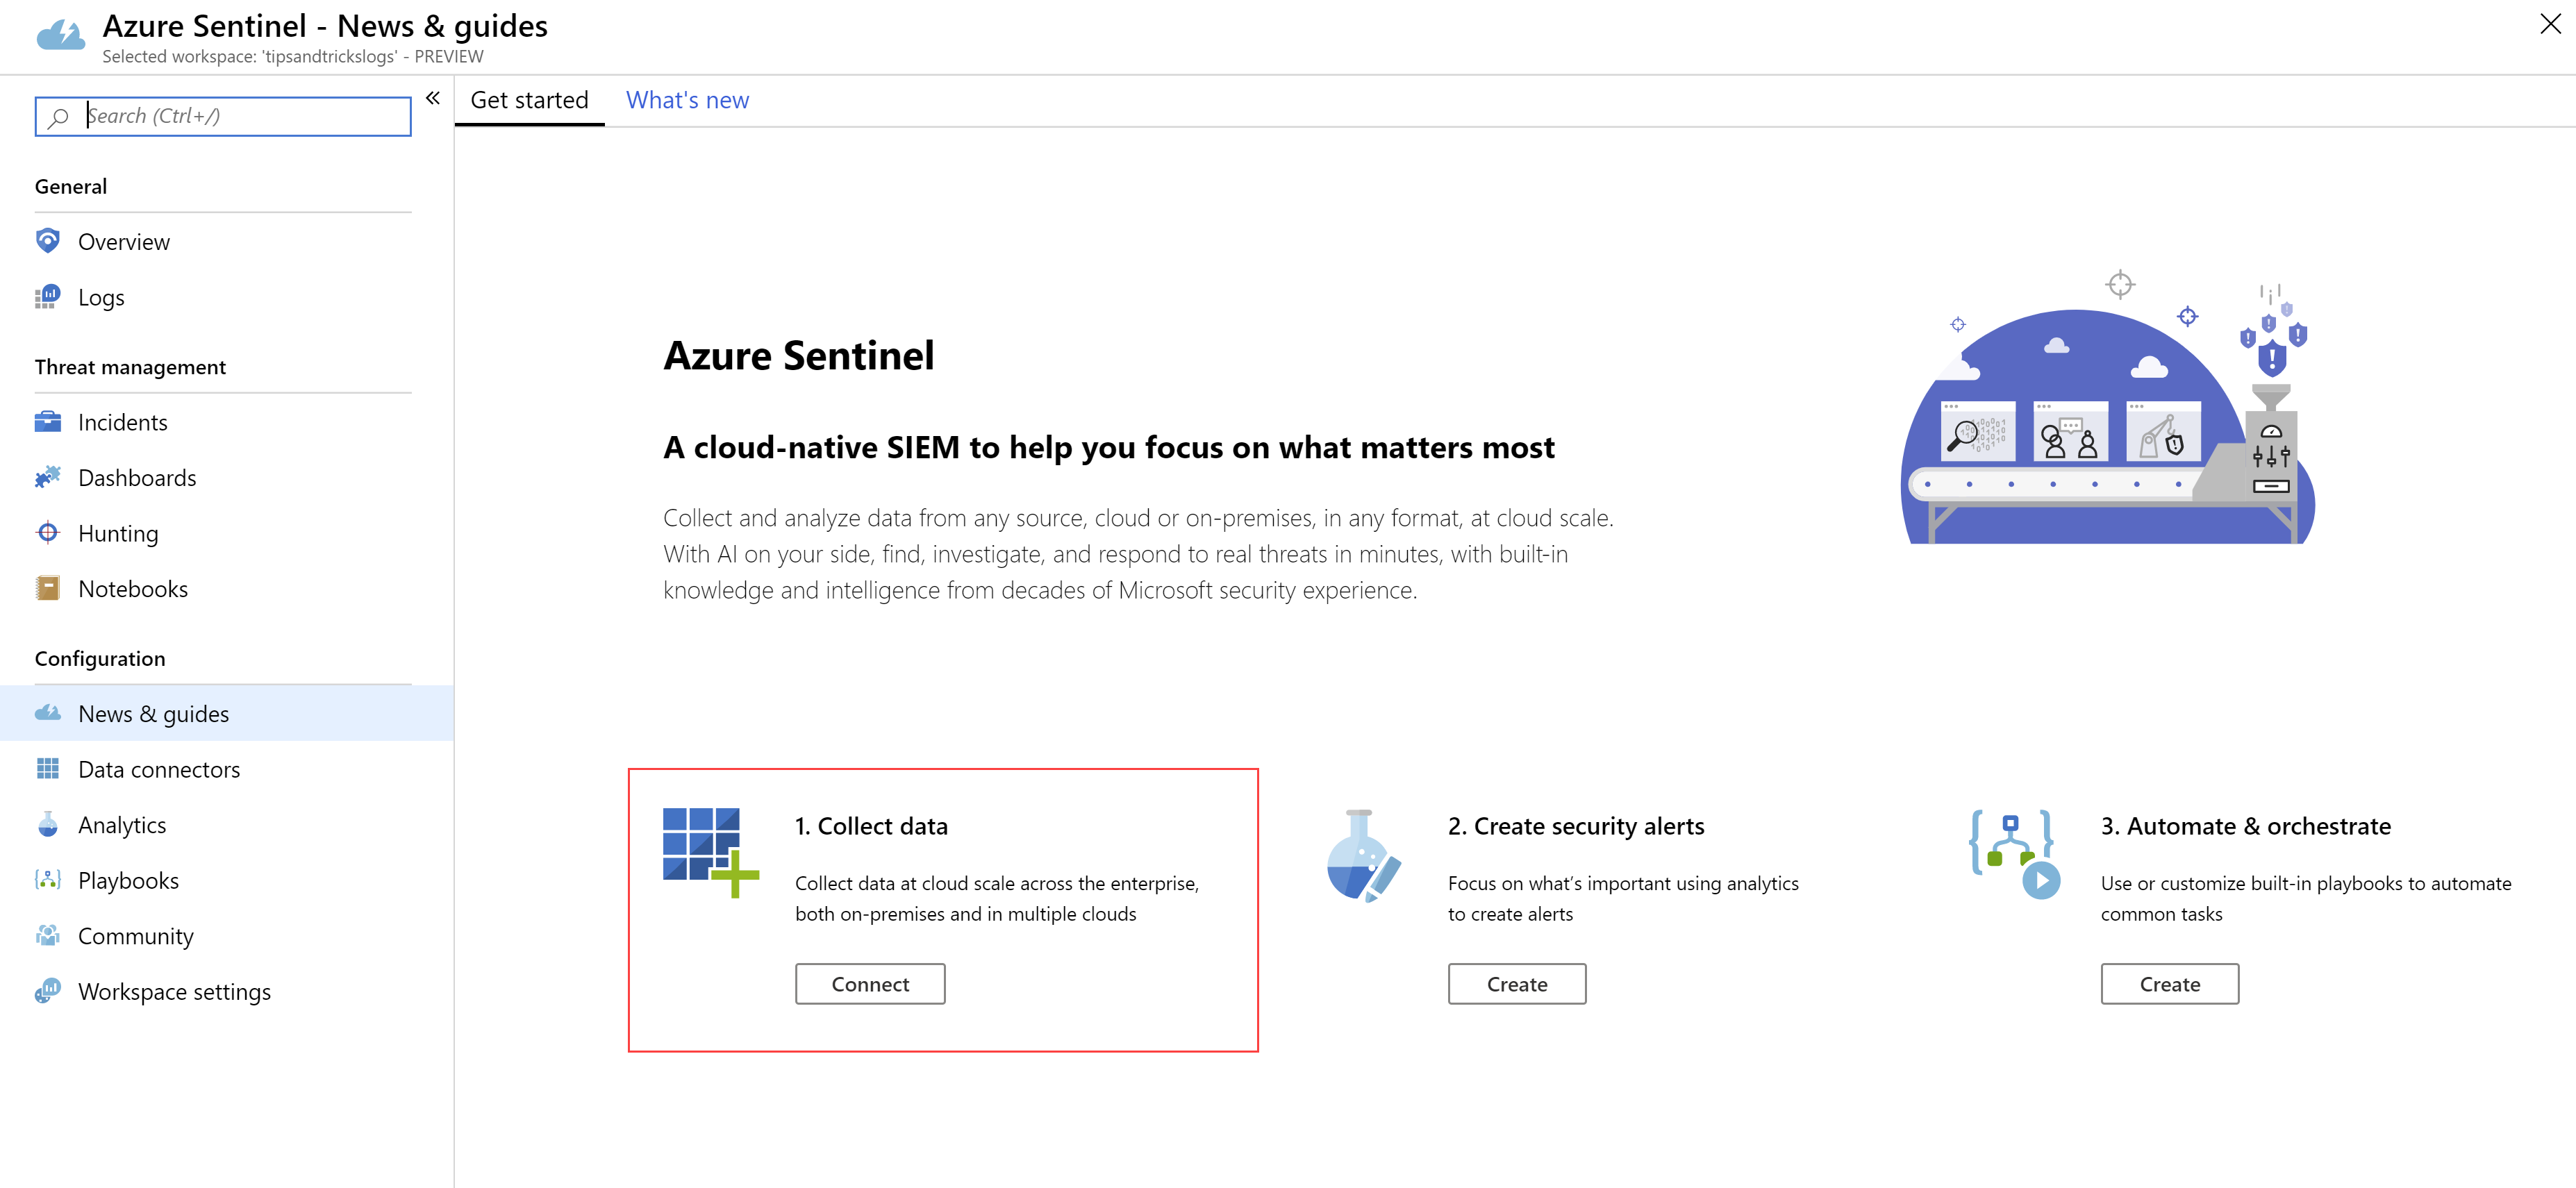
(Azure Sentinel overview in the Azure portal)
- To start gathering security information, we need to connect data sources to Azure Sentinel. Click the Connect button under the 1. Collect data message
- Let’s connect Azure Active Directory to Azure Sentinel. This will feed it with data about logins and other active directory activity. Click on Azure Active Directory and click on the Open connector page button
- Simply click the Connect buttons for the sign-in logs and the audit logs to connect Azure Active Directory
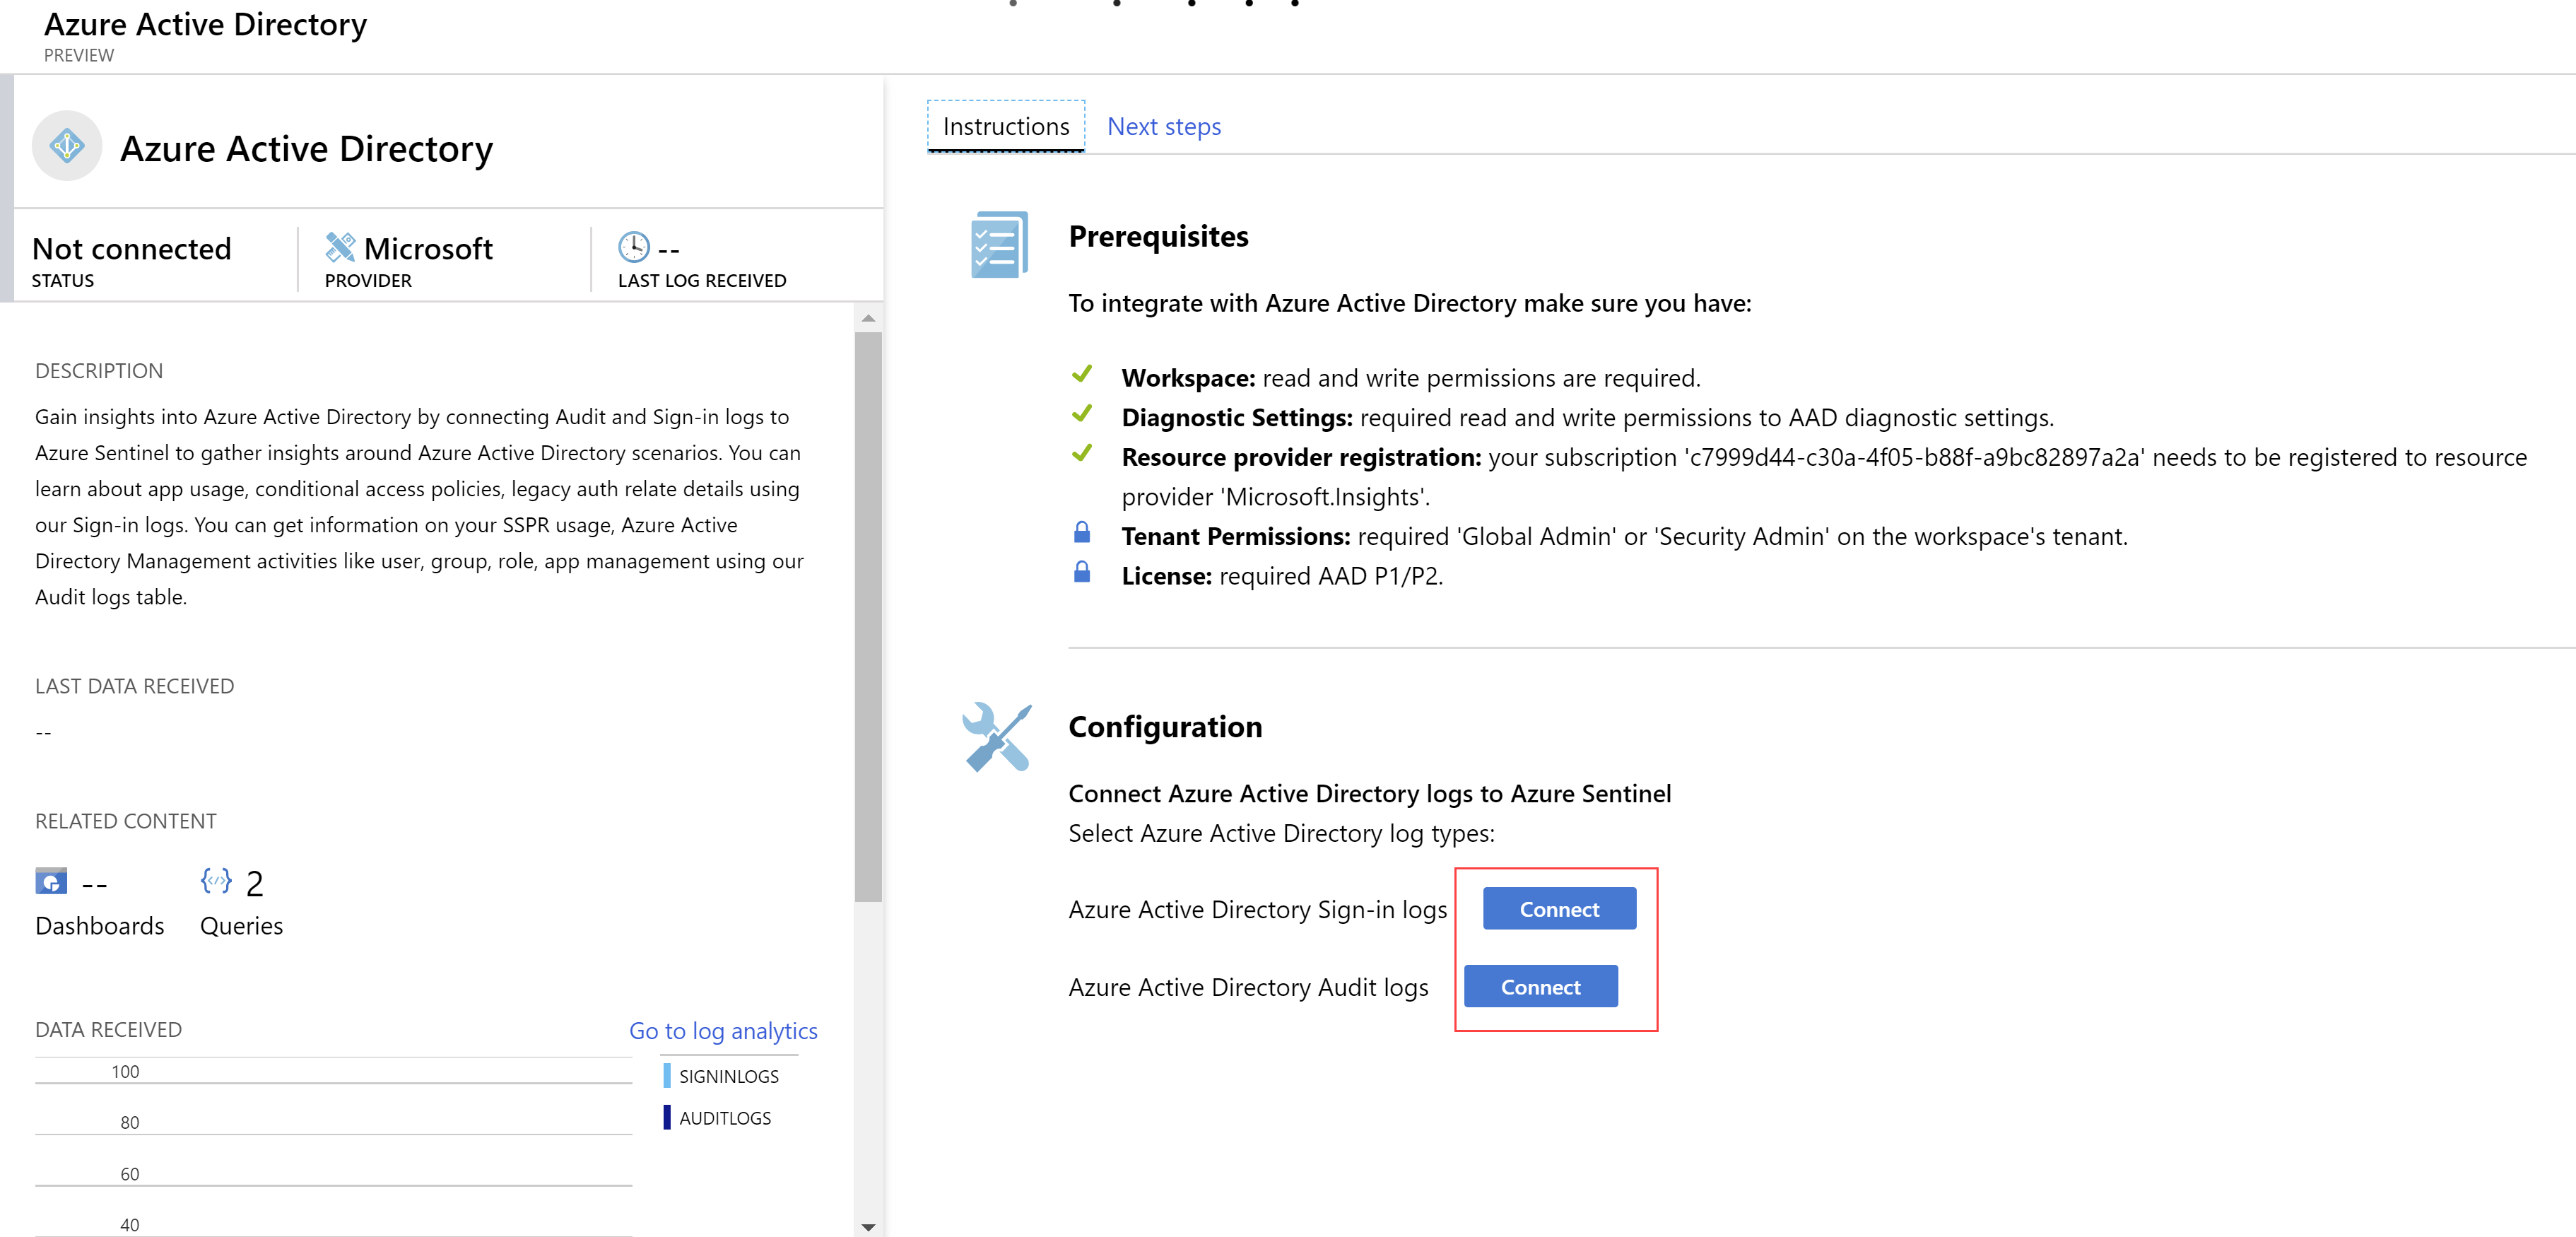
(Connect Azure Active Directory to Azure Sentinel)
- After a while, events, and possibly incidents, will appear in the Overview, like in the image below:
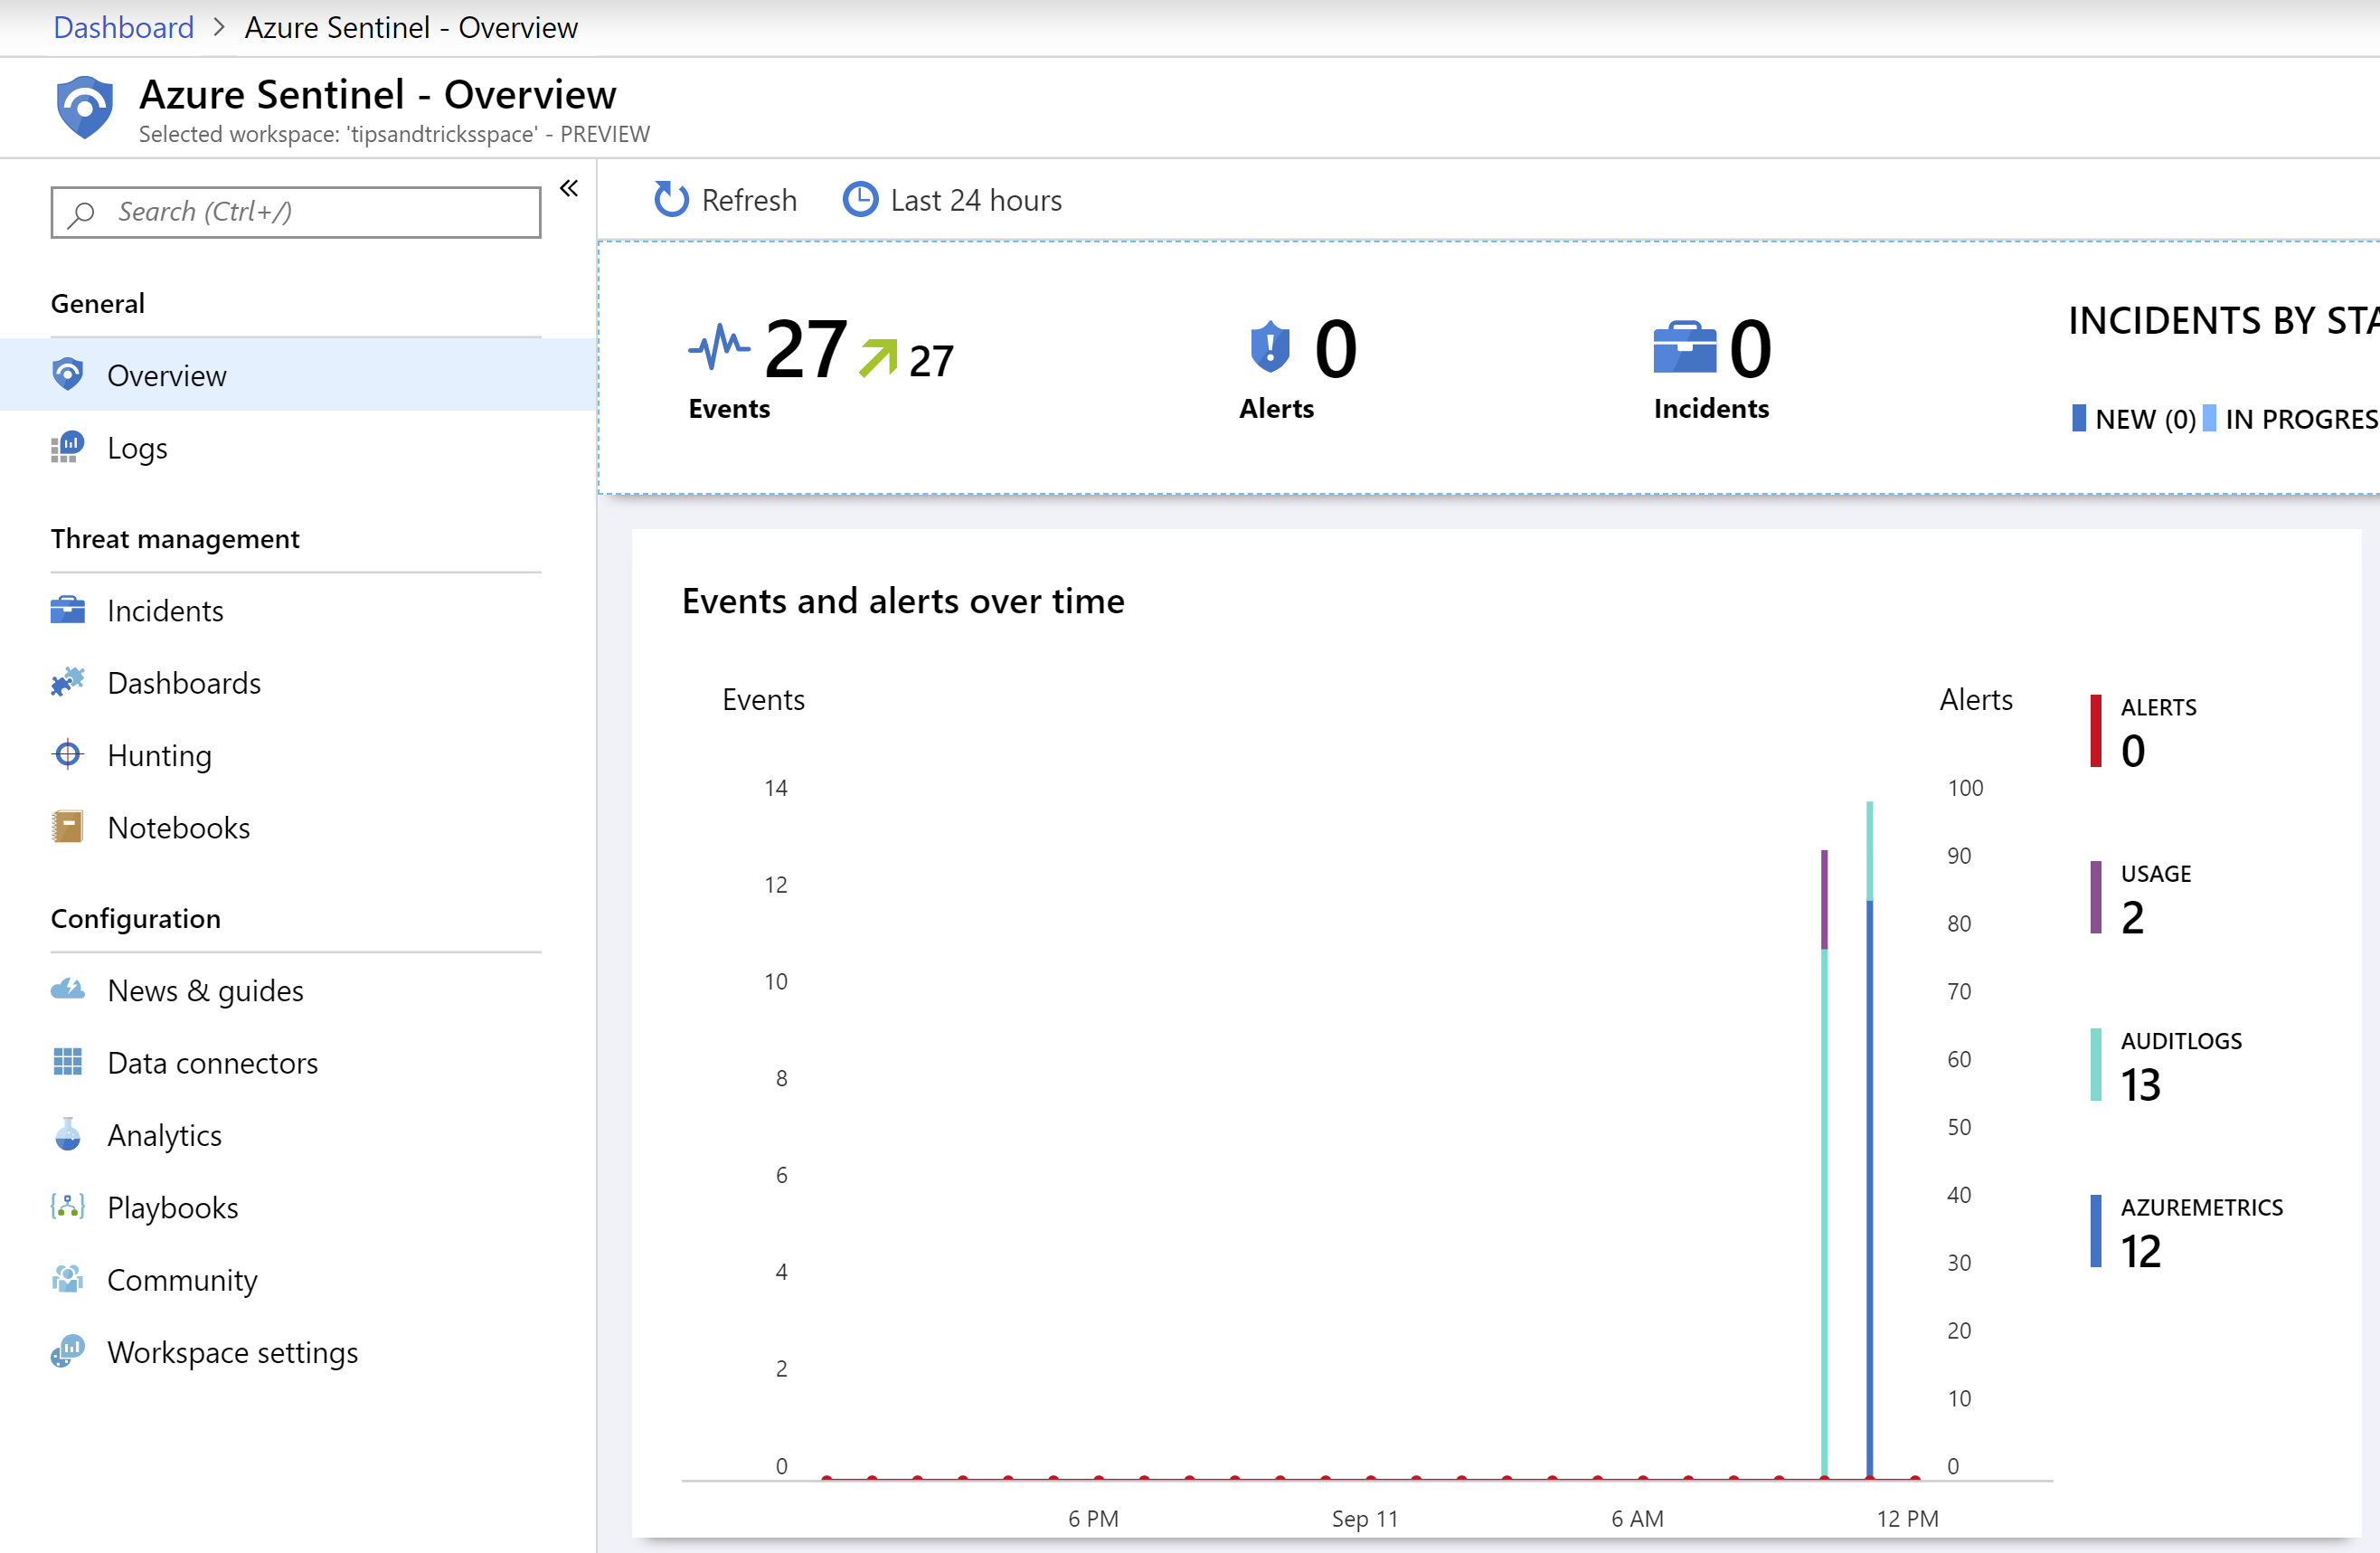
(Events in the Azure Sentinel overview)
- To get more insights into these events, we can add specific dashboards. Click on the Dashboards menu-item
- There are a lot of dashboards to choose from. As we are collecting Azure Active Directory data, let’s visualize that. Choose the Azure AD Audit logs dashboard and click Install
- Now click View Dashboard to view the dashboard. This shows all sorts of information, like how many Active Directory activities there were in a given time period and if they were successful or not. This helps you to find possible threats. Azure Sentinel offers more tools to identify threats. Like queries that you can run on your data in the “Hunting” feature and working with Azure Notebooks (opens new window)to hunt for security threats
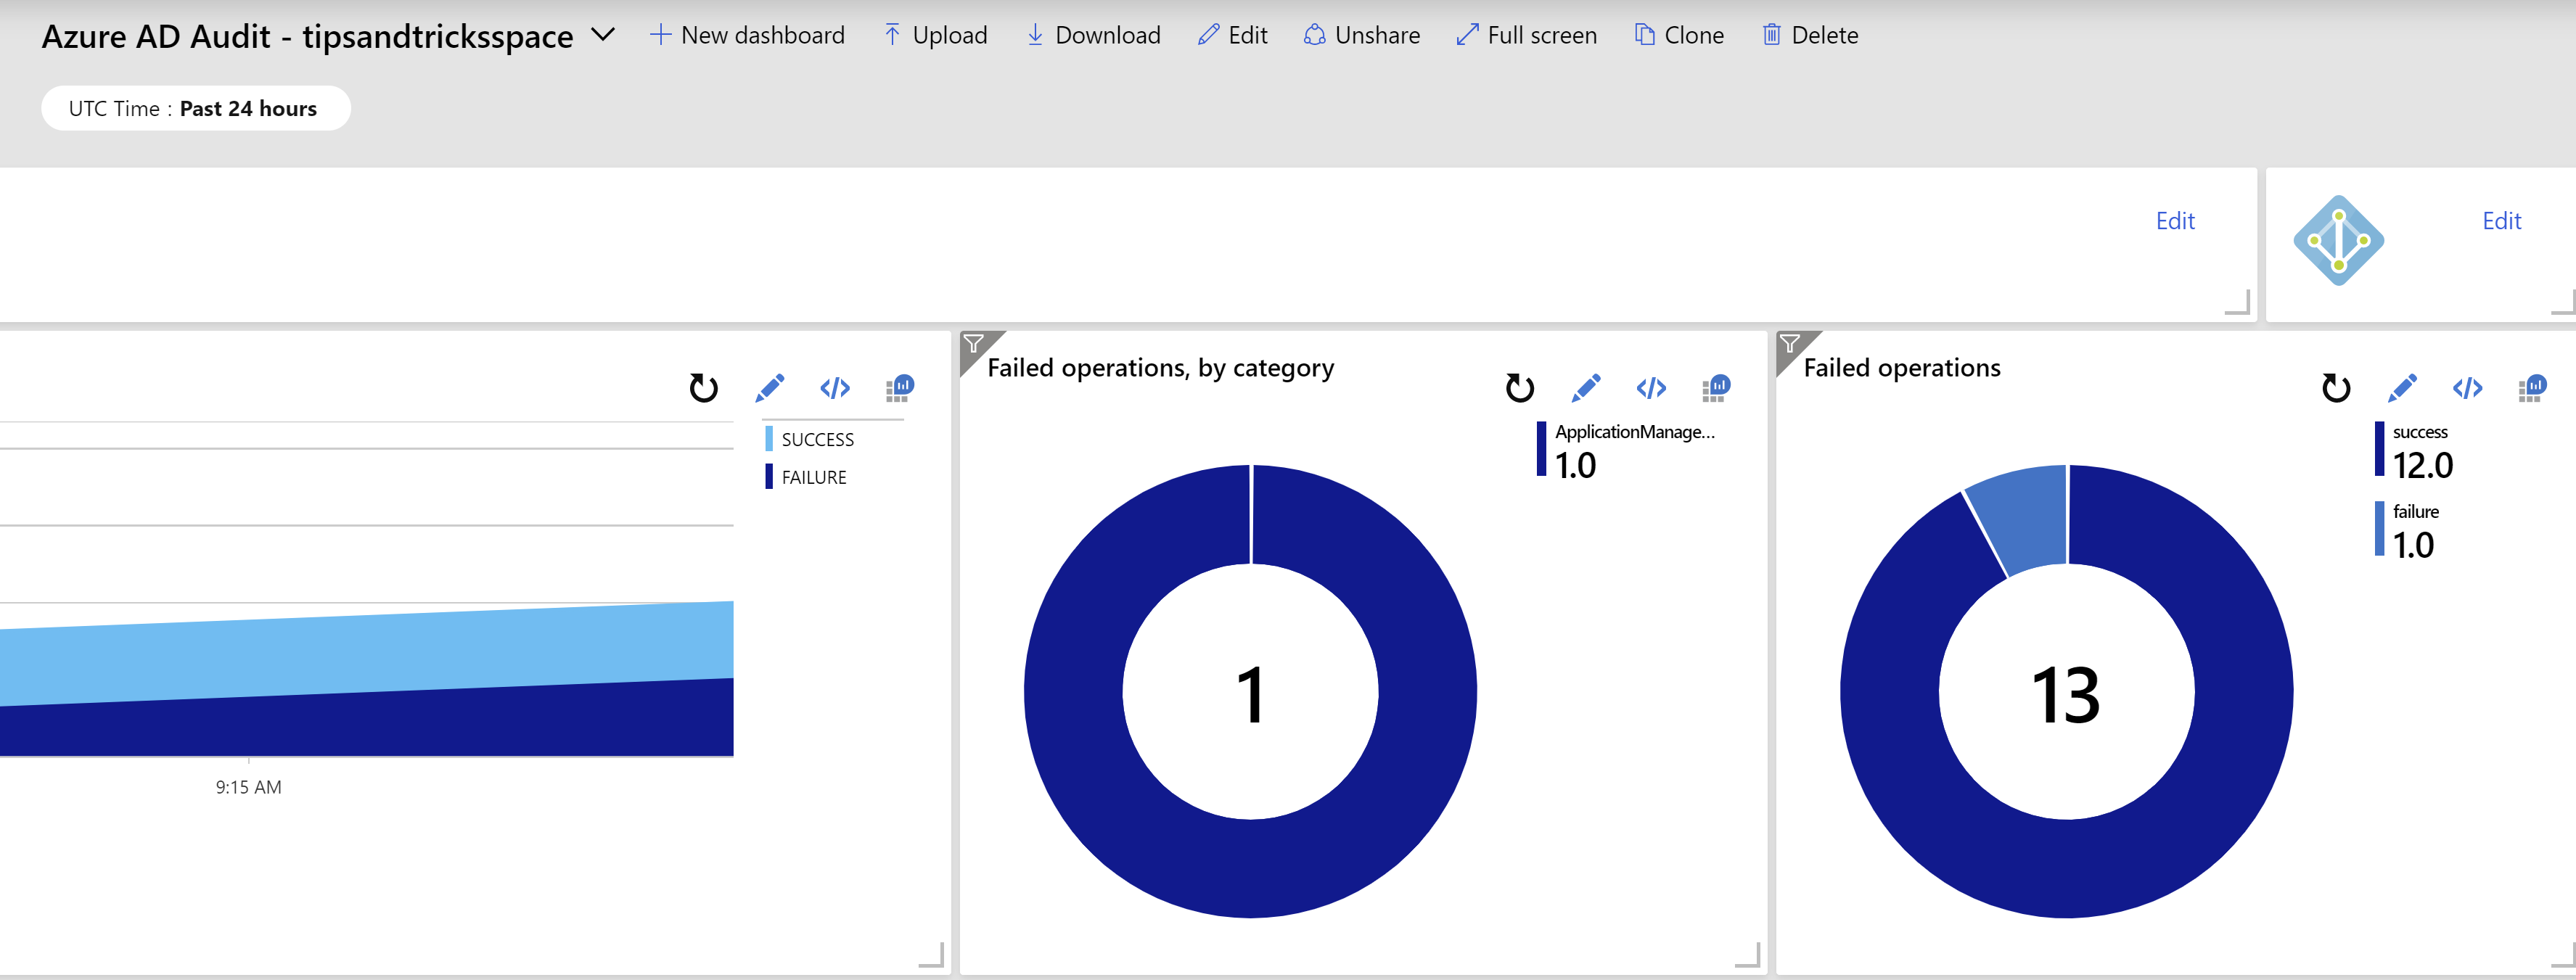
(Azure AD Dashboard in the Azure Sentinel overview)
- Azure Sentinel provides a way to automate a workflow around the information that you receive by creating “Playbooks”. This allows you to, for instance, send an e-mail or a Slack message when something happened. Click on the Playbooks menu-item
- Click Add Playbook to get started. Playbooks are Azure Logic Apps. So the Logic App Create blade opens a. Fill in a name for the playbook Logic App b. Select an existing Resource group or create a new one c. Choose a Location d. Click Create
- When the Logic App is created, the Logic App Designer opens. You can choose to create a Logic App from scratch or begin with a template. Click the template Get a notification email when Security Center creates a recommendation
- We only have to configure the Send a notification email step of this template. Click the Sign in button to sign in with your Office 365 account an authorize the Logic App to send emails on your behalf
- Fill in an email-address in the To field. This is the address that gets notified when Azure Security Center creates a new recommendation. You can leave the Subject and Body fields as they are
- Click Save to save the Logic App
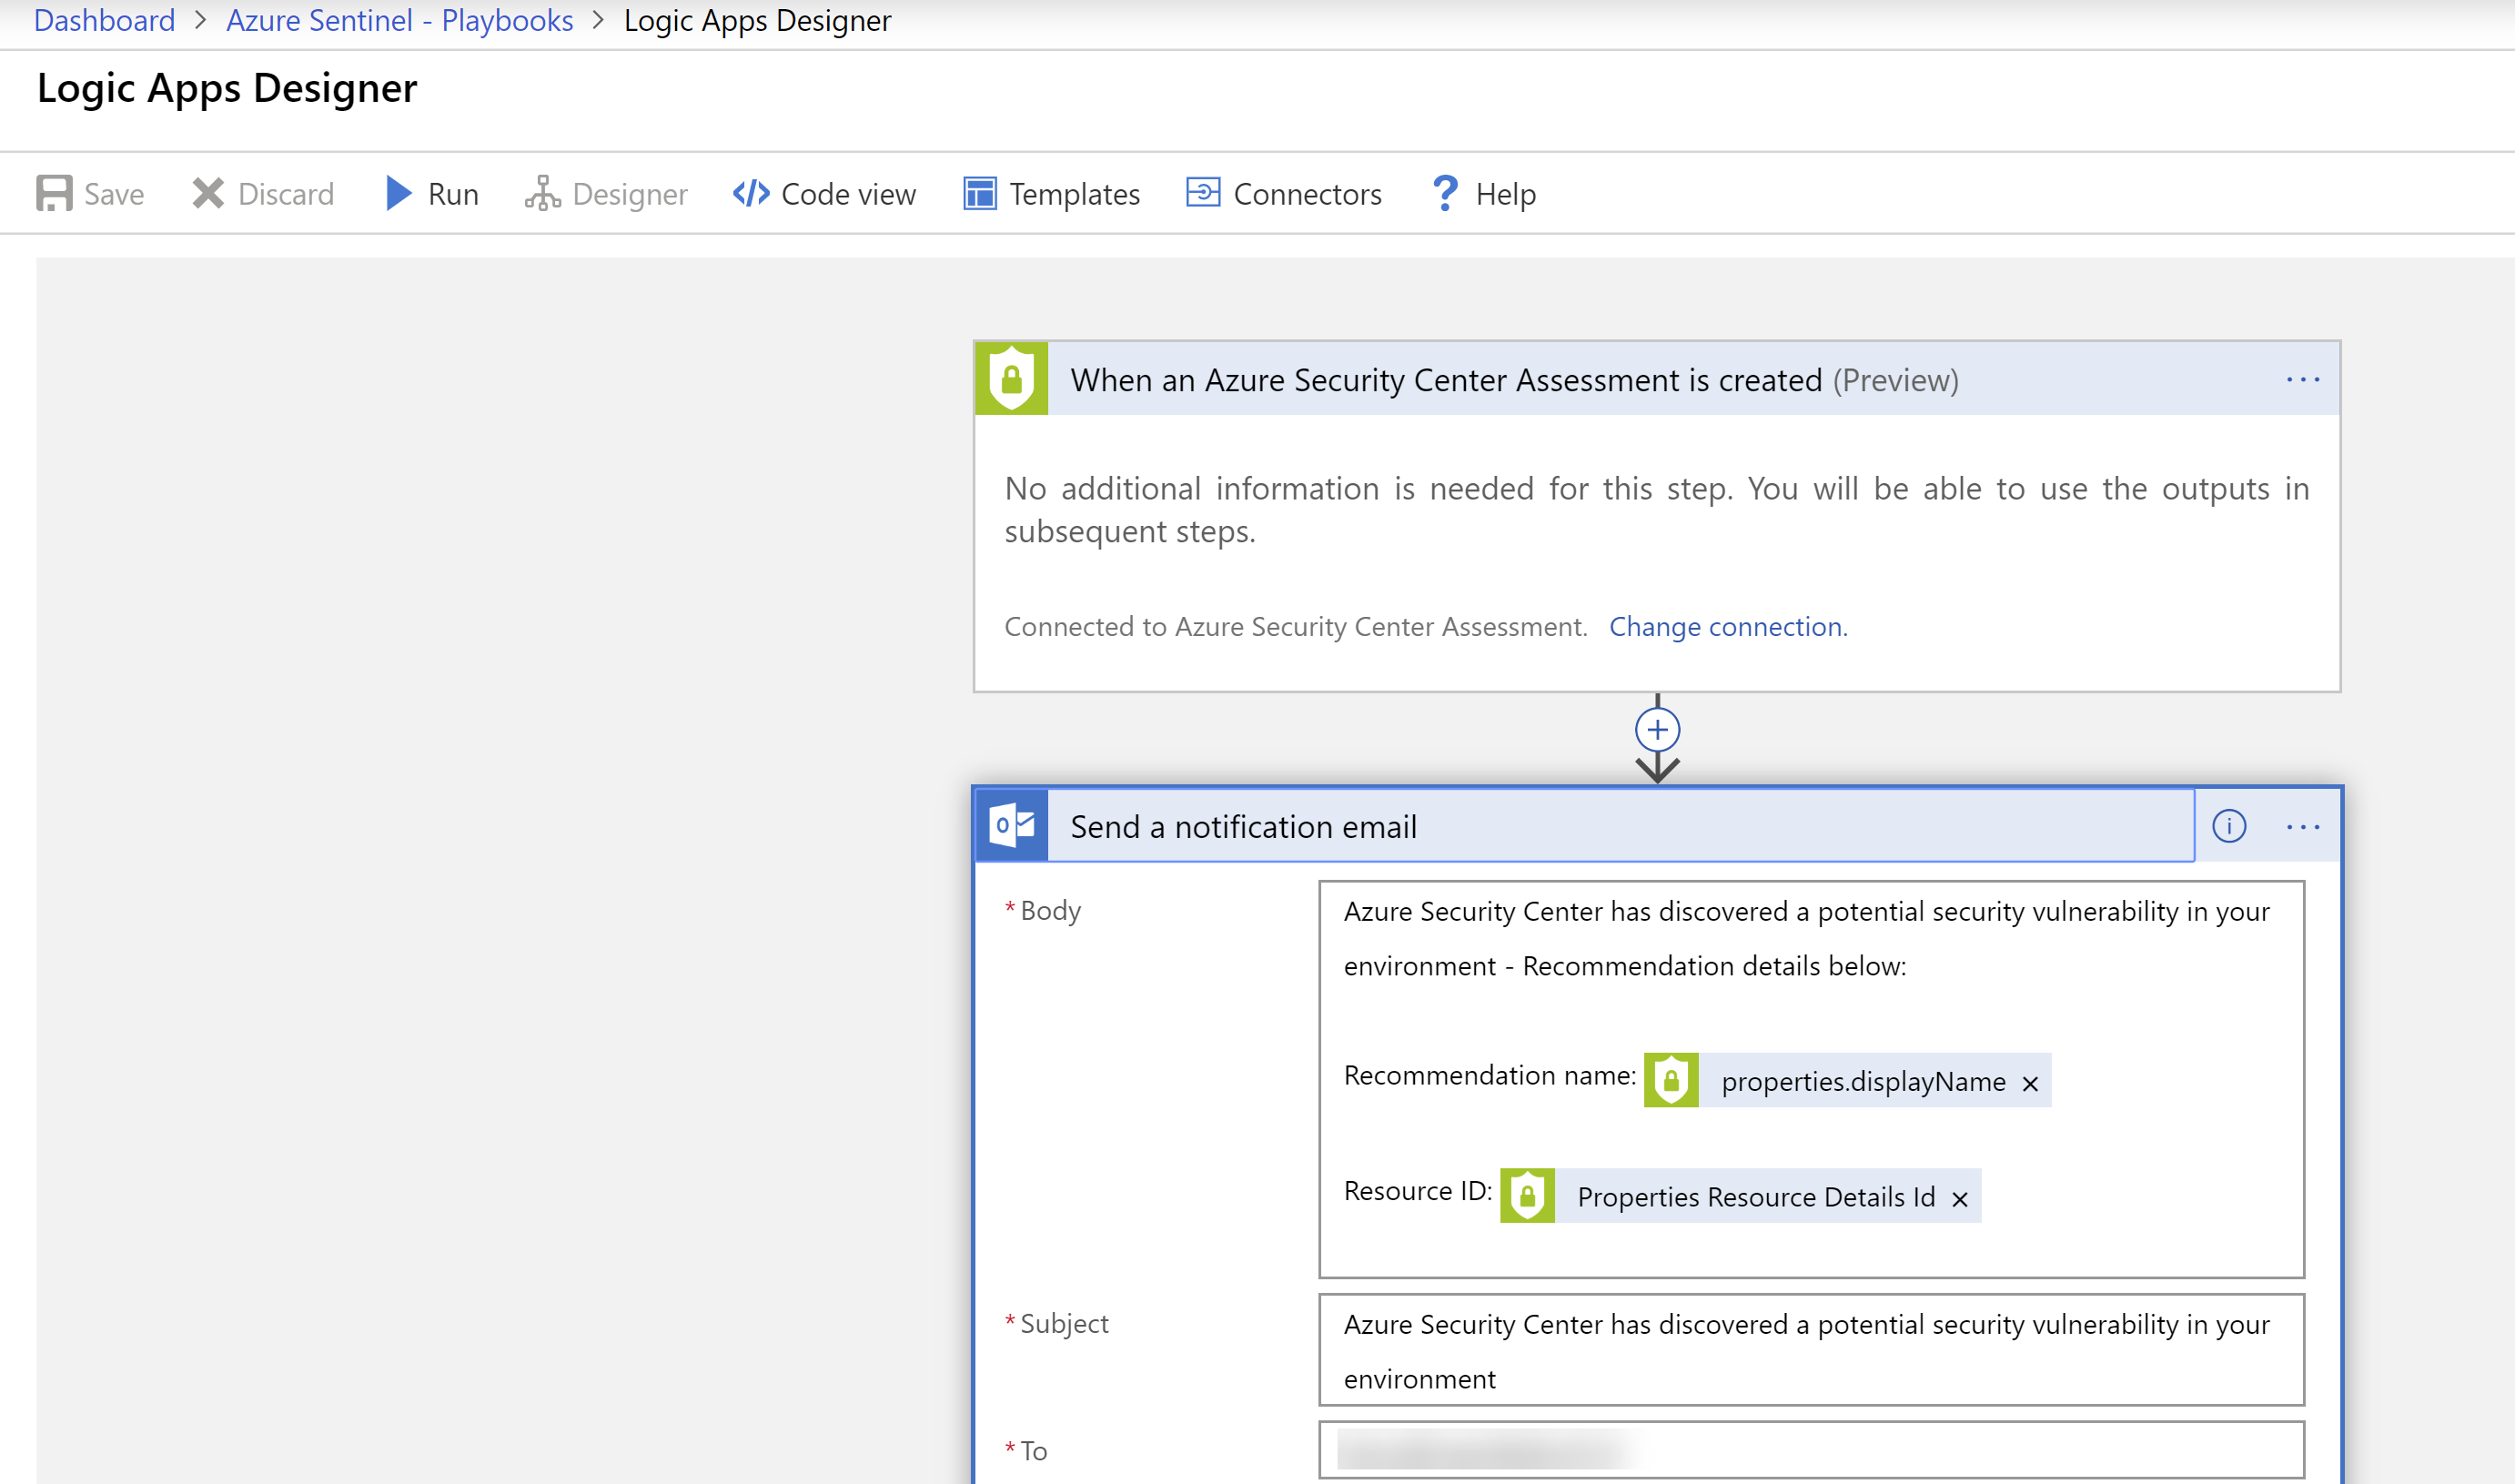
(Azure Sentinel Playbook in the Azure portal)
#Conclusion
Azure Sentinel (opens new window)helps you to detect, alert on (opens new window), investigate (opens new window)and resolve (opens new window)security incidents quickly. It provides many ways to collect and analyze data and provides flexible tools for mitigating threats. And you can do all of that without ever leaving the Azure portal. Go and check it out!